Paleo Mug Cake

Paleo Mug Cake

I have seen these recipes floating around the internet and I really had no interest in trying them.  Cake in a mug, cooked in the microwave.  It just didn’t sound appealing to me.  But, I got desperate to provide some semblance of a birthday cake for Michael’s big day and I didn’t want a huge cake sitting around my house to taunt and tempt me and since he’s not a big cake eater anyway, guess who would have consumed the lion’s share?  So, I decided to give this a whirl…


…and I was pleasantly surprised.  These were super easy to put together and contain healthy ingredients, so it doesn’t really feel like a cheat at all.  I love that I can give my kid cake and it’s good for her!  I probably won’t be making these often, but they would be great for those cool evenings when you want a warm, comforting treat.

The best part is that you probably already have these items around your house.  To make this truly paleo, you would want to use almond butter or maybe cashew butter.  I only had peanut butter on hand, so that’s what I used.  I almost always have extra ripe bananas around too.  One of the local grocery stores sells huge bags of over-ripe bananas for 99 cents, so I buy bags and freeze them.  You could add a little sweetener of your choice to this recipe, but I usually just rely on the bananas for sweetness.  You could also mix in nuts or chocolate chips or top the warm cake with some vanilla ice cream if you wanted to be extra decadent.  I added a spoonful of the peanut butter to the top of Michael’s cake while it was still hot.

mug cake

I even stuck a few candles in there so we could have a proper birthday song.  Don’t repeat my rookie mistake though.  I put one candle in while the cake was still too hot and it melted!  Let your cakes cool before you add candles, folks.

mug cakes

The verdict was yes! We will make these again!

I found the original recipe at Wannabe Chef.

Paleo Mug Cakes

  • 1 ripe banana
  • 1 egg
  • 1.5 tbsp natural nut butter of your choice
  • 2 rounded tbsp cocoa powder
  • (optional) 2 tsp sweetener of your choice

Mash up the banana with a fork until smooth.

Add the rest of the ingredients and mix into a smooth batter.

Pour into a microwave-safe mug.  Make sure the mug is only about 2/3 full, because the batter will expand.

Cook in the microwave for about 2.5 minutes, carefully remove, allow to cool and enjoy!

Cold Brewed Iced Coffee

This weekend I discovered the beauty of cold brewed coffee.  Oh my. I am a coffee addict…with standards.  I love coffee, but I’m picky about how I like it.  I usually have a cup in the morning and, around 2:00 in the afternoon, I hit a slump and usually go for another cup then.  But, […]

tomato soup with parmesan crisps

This winter is kicking my butt.  I don’t think I’m alone on this one.  I think a great many folks in the northeast have had it up to here with this winter.  Between the sub-zero temps and the layers and layers of snow piled up on one another, I’m just over it.  This week we had a run-in with a giant icicle.  It formed on the corner of our house and wrapped itself around a wire connected to our home.  I was worried that it might pull the wire down and wasn’t exactly sure of the function of said wire.  On top of that, it was hanging right over the path from our house to our car port and I wasn’t too keen on having to walk through there everyday with the giant ice dagger hanging precariously over our heads.  As the temperature climbed into the 40s this week, I hoped that a little melting would drop the icicle to the ground.  However, I arrived home from work one afternoon to see that it had indeed detached from the house and just slid down the wire, to hang even more precariously over our yard.  Seriously, this crap always happens when Michael is out of town.  Fortunately, the icicle met it’s maker at the hands of my dad and a shovel.

icicle

All this dreary, cold, gray weather has made me crave tomato soup.  I’m not sure why.  I never liked tomato soup as a kid and have only recently learned to like it, but with a grilled cheese sandwich, I do quite enjoy a nice, creamy bowl.  The only problem is that I don’t eat grilled cheese anymore, so I had to come up with an acceptable alternative.  Enter parmesan crisps.  They couldn’t be simpler.  Sprinkle a thin layer of shredded parmesan cheese (not the powdered kind) onto a cookie sheet lined with parchment paper (don’t even think about skipping the parchment) and bake it until it’s nice and brown.  As it cools it will get crispy.  They can be dipped into the soup or crumbled in like croutons.  I can’t wait to try these on top of some nice French Onion!

tomato parm

I found this tomato soup recipe on Pinterest and tweaked it ever so slightly.  It is really easy and very good.  I recently purchased an immersion blender (how did I ever live without one?) and used that to blend everything to a smooth consistency.  I also used my home made chicken bone broth instead of store bought stock.  I think I’ve made about 3 batches of this in the past month, but I’m not sick of it yet.  Give it a try this weekend!

Creamy Tomato Soup

  • 4 tablespoons butter
  • 1 onion, chopped
  • 2 (28 oz.) cans tomatoes (whole, diced, it doesn’t matter)
  • 3 cups chicken stock
  • salt and pepper, to taste
  • 1/2 cup half and half or heavy cream

Instructions:

In a large pot, over medium heat, melt the butter.  Saute the chopped onion in the butter until it is translucent.  Add the tomatoes and chicken stock to the pot and bring to a simmer.  Season with salt and pepper.  Blend with an immersion blender to desired consistency. (I like mine to have some texture.)  You could also use a regular blender if you don’t have a hand-held.  Before serving, stir in the cream and heat through.  At any point, you could also add in any other herbs, spices, or seasonings that make you happy.

This post is linked to Our Sunday Best @ Momnivore’s Dilemma.


yard sales, banana muffins and other weekend miscellany

DSC_1153(2)

Look at this face…isn’t she fab?  I love this kid.  We had such a gorgeous weekend here.  The weather couldn’t have been more perfect.  I have been so lazy with my camera lately, resorting to using my iPhone about 99.9% of the time.  So, I pulled out the DSLR for some practice.  Funny, she actually looked at the camera with intrigue and when I told her to smile and say “cheese” she actually did.  She’s so used to seeing my phone that I think she secretly protests when I try to catch her on film and I can’t even get her to look at it.  But this strange piece of equipment…what is it??  She stared at me and tried to grab it a few times.

This weekend kicked of yard sale season and our neighborhood has its community yard sales.  Oh, how I would have loved to open up shop and get rid of the many bins of baby items that are taking over our lives, but we’re hanging onto things until we have another little one.  I’m not normally a huge fan of yard sales.  I hate fighting the crowds and dealing with the heat, but this weekend was perfect.  The weather was gorgeous and since all the yard sales were taking place in our neighborhood, we just put Evelyn in the backpack carrier and set out on foot.

Michael actually got a jump start on Friday while I was at work and he found several great items.  You’ve gotta start out early or all the good stuff will be gone.  He was really looking for some outdoor toys for Evelyn, like a Little Tykes slide or other similar pieces, but we didn’t really come across any of those.  Oh well, maybe next time.

Shopping yard sales for baby and kid’s stuff is particularly fruitful, since babies and little kids tend to grow out of things very quickly and they don’t have much time to really wear things out.  A lot of people also receive items as gifts that they are never able to use, so it’s easy to find things that are barely or never used.  It amazes me that people spend the kind of money that they do on new clothes, shoes and toys for kids.  Yard sale and thrift store shopping is kind of a no-brainer for me.  It’s greener and way less expensive than shopping the malls.

So, here’s the loot…

Mini Recliner for Evelyn
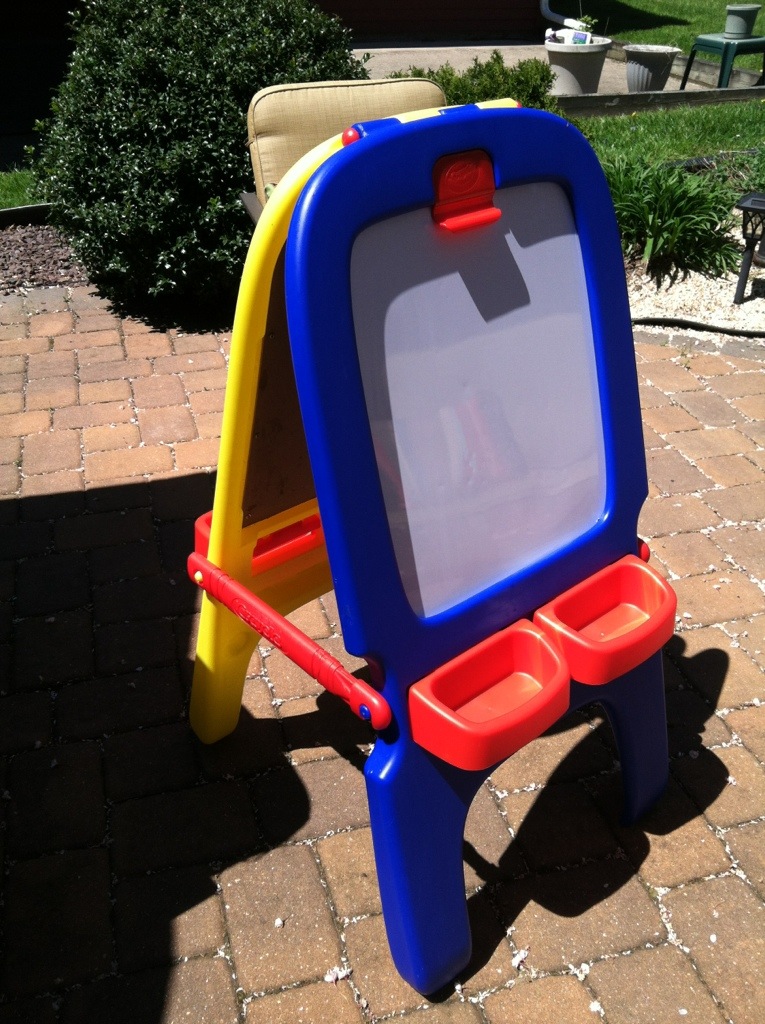
Crayola Art Easel
Crayola Art Easel
Michael picked this out.
Evelyn had a blast playing in it....just before promptly pulling it from the ceiling.
Evelyn had a blast playing in it….just before promptly pulling it from the ceiling.
In addition to these, I also picked up 3 hats, 3 pair of pajamas, a pair of jeans, another pair of shorts, and a July 4th outfit from Old Navy.
Boots!!
Boots!!
Little Tikes toy chest for outdoor toys

I got all of this for about $35!!!!  It makes me sad to think that I recently cashed in a $50 Target gift card and only got 2 pairs of shoes, a bathing suit, and 2 pairs of pajamas for Evelyn.

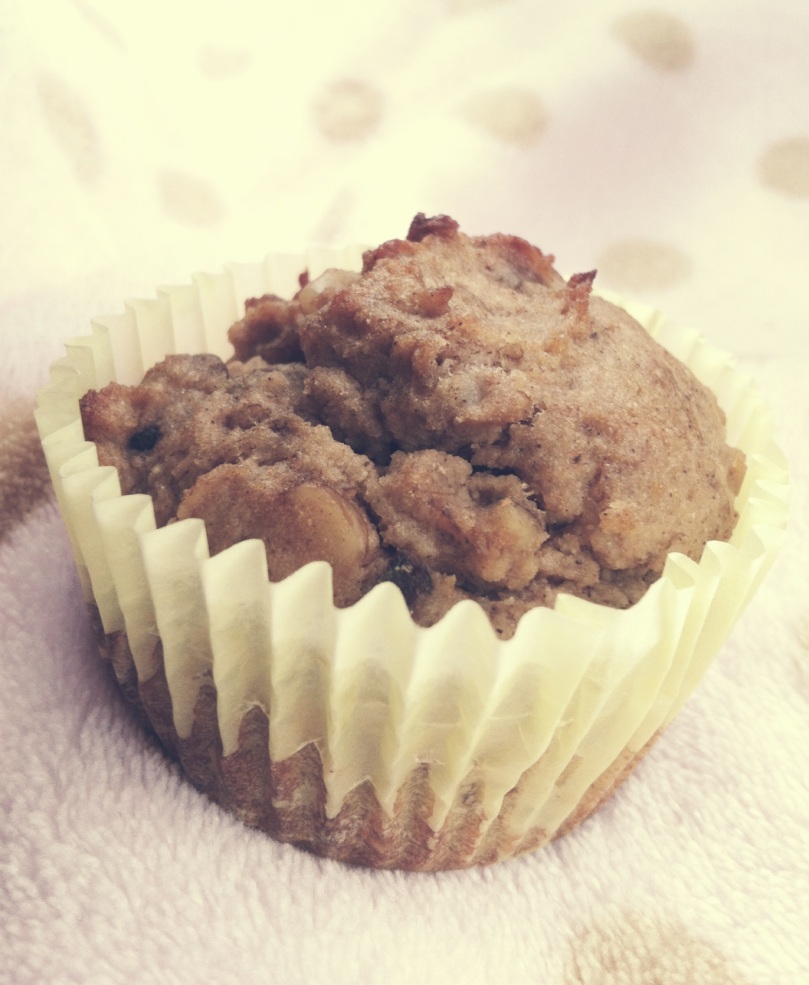
I spent most of Sunday in the kitchen, making all kinds of grain-free, sugar-free goodies.  Michael and I have been really trying to stick with our diet and cut way back on the cheating.  I made yet another batch of these awesome grain-free banana muffins.
IMG_1285

I feel pretty confident sharing this recipe.  I started making these from a recipe I found online, but I tweaked it and changed it so many times that it really feels like my own.  Evelyn loves these.  She calls them “cake”.  If this is her idea of cake, that’s just fine by me…no sugar, no gluten…just a yummy snack.

Grain-Free Banana Muffins

  • 2 very ripe bananas
  • 4 eggs
  • 1/2 cup coconut oil
  • 1 tbsp vanilla extract
  • 1/2 cup coconut flour
  • 1/4 tsp baking soda

Mash the bananas and mix all the wet ingredients together.  I like to use a hand mixer.  I usually put the coconut oil in the microwave for about 30 seconds to bring it to liquid form before adding it to the eggs and bananas.

Sift the dry ingredients into the batter and stir to combine.  Scoop the batter into a muffin pan lined with paper liners.  The batter doesn’t rise much, so you can fill them a bit more than you would with regular muffins.  Bake at 350 for about 30 minutes.

Well, it seems that spring is finally here.  Evelyn even enjoyed her first popsicle of the season.

20130505-210613.jpg

Have a great week!!

grain-free banana bread

Ok, so I know I just recently mentioned that I try to stay away from primal versions of non-primal foods, but I have found a few palatable recipes that mimic some non-primal treats.  One of them is this banana bread recipe.  Most of my searching for recipes like this happened when I was pregnant and I was having all kinds of cravings and aversions.  I found this recipe over at TGIPaleo after I started to get bored with another banana bread recipe I was using.  I happened to have all the ingredients on hand and I needed to use up some overly ripe bananas.  I liked the first batch I made, but decided it wasn’t quite sweet enough for me, so when I made it tonight, I added a little honey to the original recipe.  The result was a lovely, moist, mildly sweet treat.  This is the kind of food that I probably shouldn’t eat every day, but it’s great to have around if I need to grab a quick breakfast on my was out the door.  I also found it’s great to take on camping trips to have on hand for breakfast or a snack (and my non-primal family gobbled it up!)  the original recipe calls for:

  • 3 very ripe bananas
  • 6 eggs
  • 1 T vanilla
  • 1/2 cup coconut flour
  • 1/2 cup ground flax
  • 1 tsp baking soda
  • 1 tsp salt
  • 2 tsp cinnamon
  • 1/4 cup honey (my addition and totally optional)

First mash all the wet ingredients together.

Then mix in all the dry ingredients (I used a hand mixer).

Pour into a greased loaf pan and bake at 350 for 45-55 minutes.

I think I am going to try this again in the Fall with pumpkin instead of bananas.  I might even throw in some walnuts or pecans!

diy: natural styling gel for curls

I love my curls. Most people tell me they love my hair and then ask me if I hate it. I guess most people assume that we always want what we don’t have (in my case, straight hair), but that is not the case for me at all. I suppose there was a time when I struggled with my curly hair. I got teased in school and it took me a long time, testing a zillion products (all claiming to tame the frizz) to finally find a routine that works. I don’t even want to think about the amount of money I spent.

20120809-202304.jpg

I prefer not to beat my hair into submission. Spending hours with a blow dryer and flat iron does not seem like a good time to me…and well, I have better things to do. I run into so many seemingly straight-haired girls who tell me that they have natural curls, but if they let their hair go curly it would never look like mine. Well, ok, it probably wouldn’t look exactly like mine because we’re all different, right? That’s what makes the world an interesting place. But, I would argue that your curls can look awesome with a few simple tricks. One of mine is flax seed gel.

I learned how to make it a few years ago when I used to frequent the boards of naturallycurly.com.

It’s really pretty easy.  Go grab the following:

  • a small saucepan and spoon
  • a fine mesh strainer
  • flax seeds
  • water
  • a container for storage
  • *optional*: citric acid, essential oil

Ok, have you gathered all your supplies?  Good.  Let’s get started.

  1. First, boil about 2 cups of water on the stovetop.
  2. Once the water is boiling, add about 1/2 cup of flax seeds and turn the heat down to med-low.
  3. Simmer the flax seeds for up to 10 minutes.  DON’T walk away!  You really gotta watch this stuff once it starts simmering.  It can get thick pretty quickly and if you cook it too long you won’t be able to strain it.
  4. It’s ready when the liquid thickens, sticks to your spoon, and has a snotty consistency.  Sorry, I can’t really think of a better comparison.  It really does look like snot.
  5. Once you think it’s ready, strain out the seeds with the fine mesh strainer and collect your gel in a storage container.
  6. Now you have a few options.  This stuff will go rancid (and stinky) if it’s left on the shelf.  You can either store it in the refrigerator or add about 1/4 tsp of citric acid to act as a preservative.  You can also add a few drops of essential oil to add fragrance.  I prefer to store mine in the fridge because it stays thicker.  I’ve found that if I add citric acid and keep it on the shelf, it tends to get runny, but this method is good if you want to travel with it and don’t have access to a fridge.

Ok, now you have your amazing curly hair gel.  Next, the trick is applying it.  One of my favorite things about this stuff is that it doesn’t make your hair crunchy or sticky.  To get the best results, you have to use a lot of it.  Don’t be afraid to use too much.  I use it in combination with a technique called plopping.  Once I’ve plopped for about 10 minutes, I just scrunch a couple of palms full of this gel into my hair.  It’s ok if your hair feels a little slimy.  Now let your hair air dry and when it’s dry or almost dry, you can turn your head upside-down and scrunch it a little to soften any crunchiness that might have formed.  You could blow-dry with a diffuser, but I rarely do this.

Viola!  You are going to have awesome curls!

So, do you have natural curls?  Do you embrace them or fight them?  What do you do to tame the little beasties?

diy: flax seed gel for curls

curls

I love my curls. Most people tell me they love my hair and then ask me if I hate it. I guess most people assume that we always want what we don’t have (in my case, straight hair), but that is not the case for me at all. I suppose there was a time when I struggled with my curly hair. I got teased in school and it took me a long time, testing a zillion products (all claiming to tame the frizz) to finally find a routine that works. I don’t even want to think about the amount of money I spent.

I prefer not to beat my hair into submission. Spending hours with a blow dryer and flat iron does not seem like a good time to me…and well, I have better things to do. I run into so many seemingly straight-haired girls who tell me that they have natural curls, but if they let their hair go curly it would never look like mine. Well, ok, it probably wouldn’t look exactly like mine because we’re all different, right? That’s what makes the world an interesting place. But, I would argue that your curls can look awesome with a few simple tricks. One of mine is flax seed gel.

I learned how to make it a few years ago when I used to frequent the boards of naturallycurly.com.

It’s really pretty easy.  Go grab the following:

  • a small saucepan and spoon
  • a fine mesh strainer
  • flax seeds
  • water
  • a container for storage
  • *optional*: citric acid, essential oil

Ok, have you gathered all your supplies?  Good.  Let’s get started.

  1. First, boil about 2 cups of water on the stovetop.
  2. Once the water is boiling, add about 1/2 cup of flax seeds and turn the heat down to med-low.
  3. Simmer the flax seeds for up to 10 minutes.  DON’T walk away!  You really gotta watch this stuff once it starts simmering.  It can get thick pretty quickly and if you cook it too long you won’t be able to strain it.
  4. It’s ready when the liquid thickens, sticks to your spoon, and has a snotty consistency.  Sorry, I can’t really think of a better comparison.  It really does look like snot.
  5. Once you think it’s ready, strain out the seeds with the fine mesh strainer and collect your gel in a storage container.
  6. Now you have a few options.  This stuff will go rancid (and stinky) if it’s left on the shelf.  You can either store it in the refrigerator or add about 1/4 tsp of citric acid to act as a preservative.  You can also add a few drops of essential oil to add fragrance.  I prefer to store mine in the fridge because it stays thicker.  I’ve found that if I add citric acid and keep it on the shelf, it tends to get runny, but this method is good if you want to travel with it and don’t have access to a fridge.

Ok, now you have your amazing curly hair gel.  Next, the trick is applying it.  One of my favorite things about this stuff is that it doesn’t make your hair crunchy or sticky.  To get the best results, you have to use a lot of it.  Don’t be afraid to use too much.  I use it in combination with a technique called plopping.  Once I’ve plopped for about 10 minutes, I just scrunch a couple of palms full of this gel into my hair.  It’s ok if your hair feels a little slimy.  Now let your hair air dry and when it’s dry or almost dry, you can turn your head upside-down and scrunch it a little to soften any crunchiness that might have formed.  You could blow-dry with a diffuser, but I rarely do this.

Viola!  You are going to have awesome curls!

So, do you have natural curls?  Do you embrace them or fight them?  What do you do to tame the little beasties?